
How to create a Virtual Preload campaign
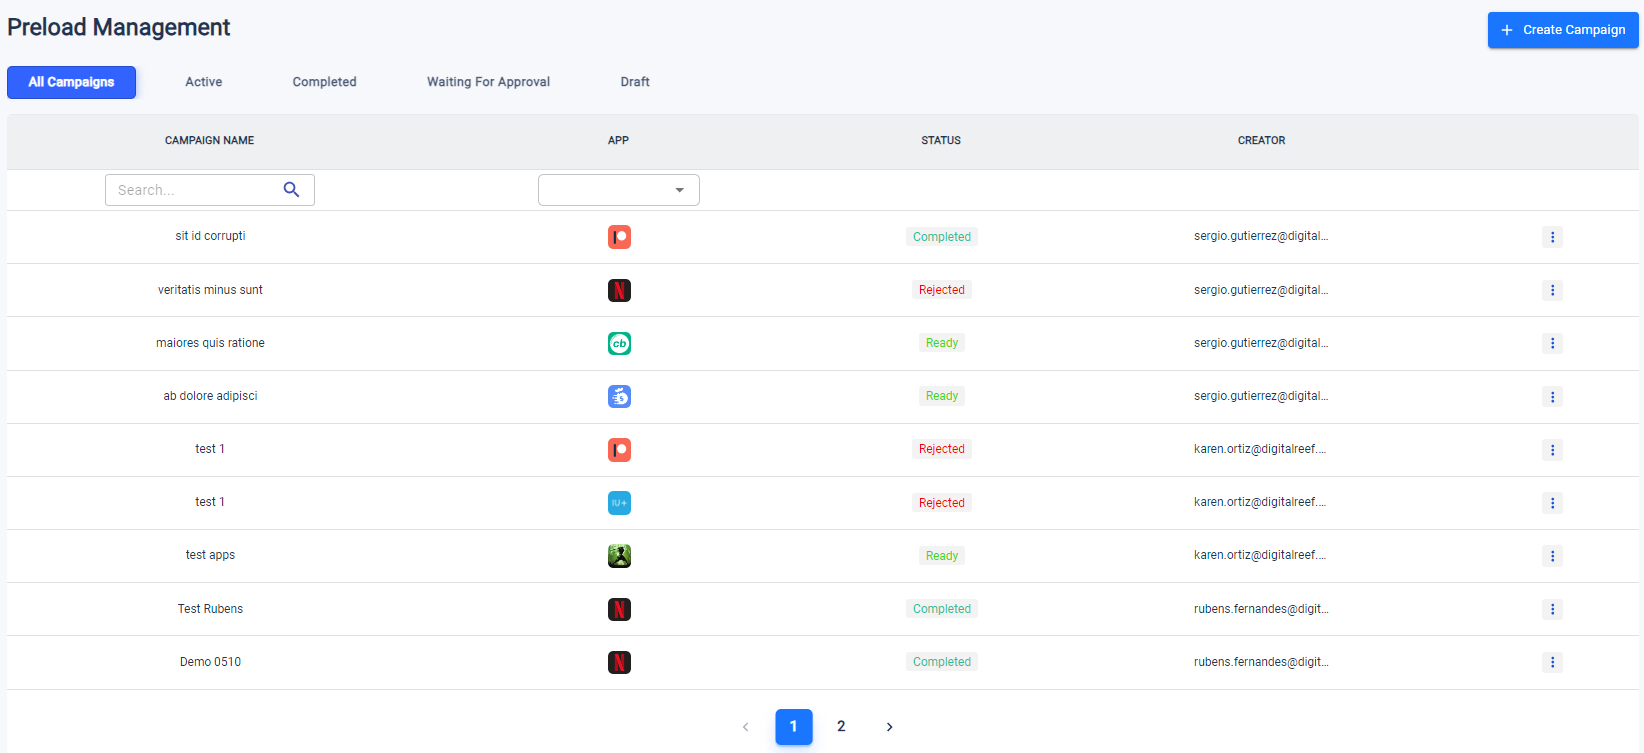
When you start working with Virtual Preload, the first thing you have to access is the Preload Management. On this page, we find the list of preload campaigns/draft with their information: Campaign Name, app used in the campaign, status of the campaign and creator.
Step by step to create a Virtual Preload campaign
To create and send a virtual preload campaign all you need to do is:
Create Campaign
In the upper right corner of the view, you can find a "Create Cmpaign" button; when the user click it, will be redirected to the registration step.

Registration
In this step the user must enter the name of the campaign and the application to be published. Additionally, the user will have the option to enter an insertion order.

When selecting an app, only the apps with active status in App Management will be shown, to use an app with inactive status, the user must go to App Management and change the status. In case the app is not in the platform, the user will be able to load it by clicking on the "+" button located under the application selector.
It is important to note that only one application can be selected per campaign; likewise, an app can only be in an active campaign for one specific device at a time.
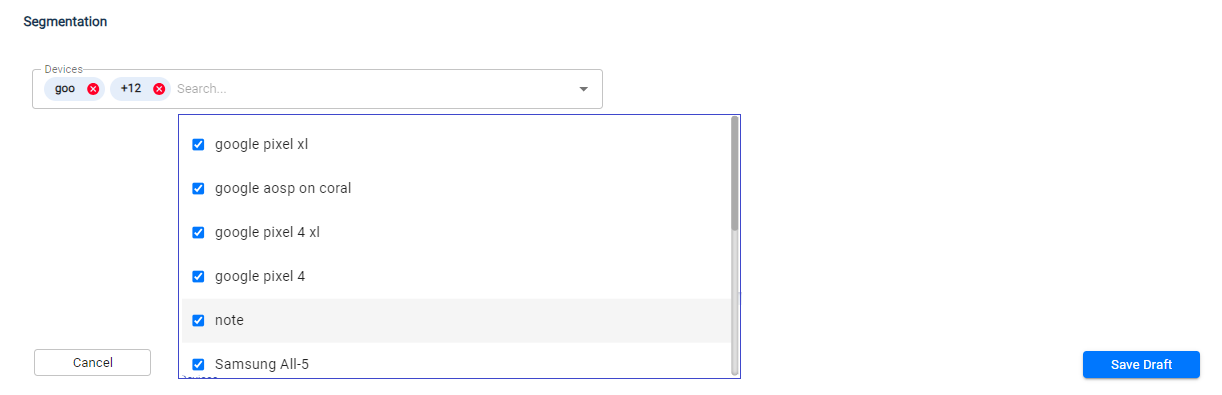
Segmentation
The segmentation will be given by device models. By default, all devices will be selected; if the user wishes to restrict the campaign to certain models, it will be possible to deselect them by clicking on the models that are not required.
Preload Campaign status and approval flow
Once your Campaign Draft is finished, it has to go through the approval flow in order to go live. Here is how it works:
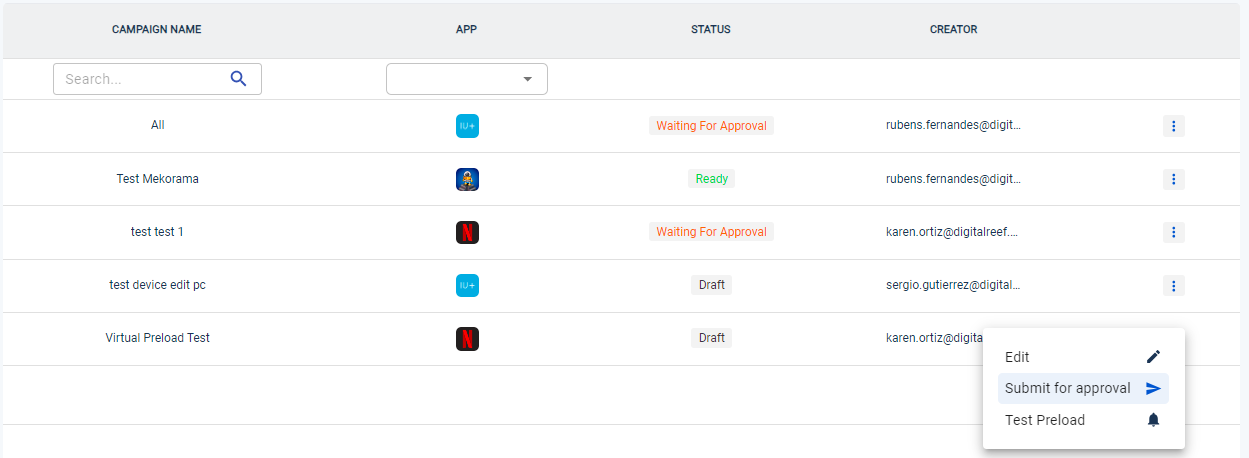
- After you create a draft campaign, it appears on the campaign list, inside the Preload Management page, with the "Draft" state. To submit for approval, you must click on the action menu in the right sidebar and select the "Submit for Approval" option.
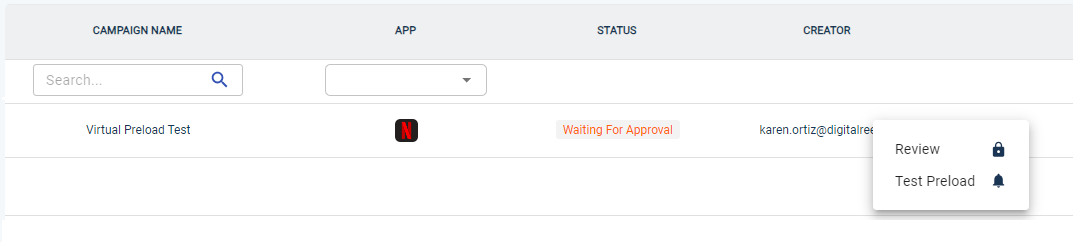
- Once you have submited your campaign for approval, it moves to the "Waiting for Approval" state. This state means that this campaign is pending to be reviewed for Approver user.
- To start its revision, a user who has the user permission of "Preload Approver" has to click on "Review"
- When the user clicks on it, a modal will be displayed with the information of the campaign pending approval. The user will be able to review the relevant information and approve or reject the campaign.

- If the Preload Approver rejects the campaign, it will be sent to "Rejected" status, where the Preload Creator will have the opportunity to edit and correct it. Once corrected, the campaign must be resubmitted for approval.
- If the campaign is approved, it will go to ready status and then, to active status when it starts running according to the campaign configuration.
Updated 7 months ago