
How to create a Push or Inapp Campaign?
1 - New Campaign
Under “Campaigns” > “Campaign Management”, Click on “Create Campaign”

2 - Registration
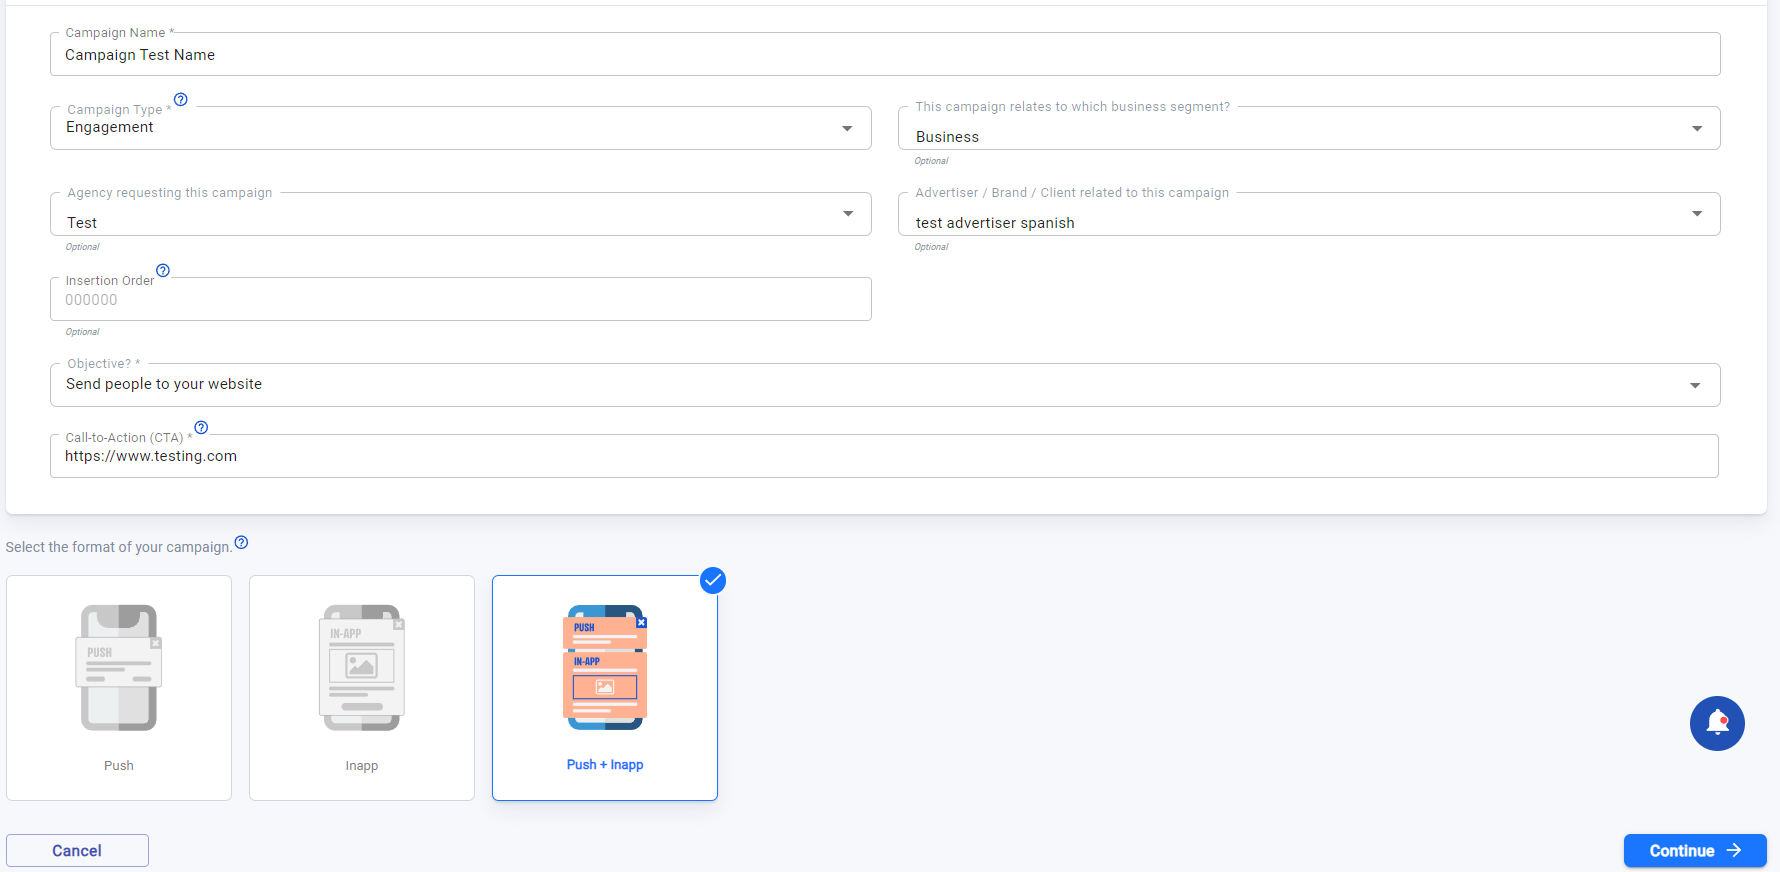
Fill in information about your campaign, select your campaign format (Push or In-app or Push + In-App) and click “Continue”. Please note that the In-App type is only available in "Engagement" campaigns.
Campaign Objective
It is important to properly select the type of objective for your campaign. The objective defines what you want your campaign to achieve. Depending on this objective, specific Call-to-Actions and Templates will be made available.
3 - Template
Each format comes with specific campaign templates that reflect the selected objective.
Choose your template here, then click "Continue".

For more detailed information on formats Click here.
[Video] - Registration / Format / Template
4 - Creative
Define the message for your notification by filling in the title and message text.
- You can include an icon by toggling on "Show icon upload options".
- The Call-to-Action link in your notification will automatically use the link provided in the CTA link field, from the Registration section.
- You can edit the text that will go on the CTA button.
Note that, for Monetization campaigns, the Call-to-Action link is a mandatory field since without it the selected objective cannot be achieved.

For Engagement campaigns only, you have the option to customize color and size of specific fields. Click hereto learn more.
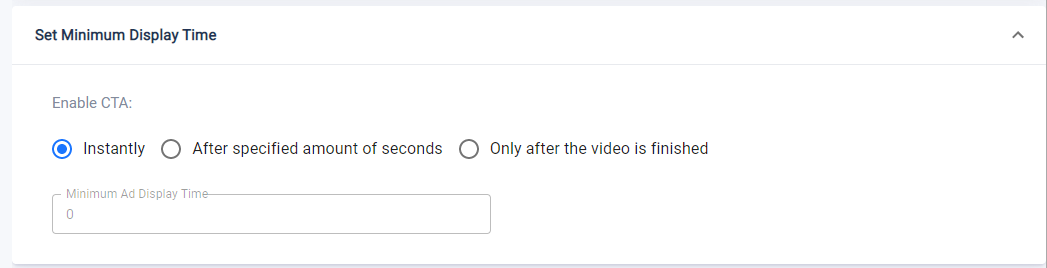
Set Minimum Display Time
Specifically for In-App messages in Monetization campaigns, you have the option to set the minimum display time of the In-App.
You can specify the number of seconds before the user is allowed to click on the Call-to-Action button.
This allows us to force the user to look at the content for a predetermined time, guaranteeing exposure to the ad.
For images, we have the option to enable the CTA instantly (no minimum time) or after x seconds. For videos we also have the option to only enable the CTA only after the video is watched until the end.
[Video] - Creative
5 - Settings
Here is where you can specify the parameters of your campaign.
Audience
Select to whom you wish to send your campaign. You can select from previously created Audiences or click on “Create New Audience” to create a new one from scratch.
To know more go to Audience Selection: know more.

Source Package Selection
Specifically for Engagement campaigns, you need to select the source package to which this campaign will be sent.
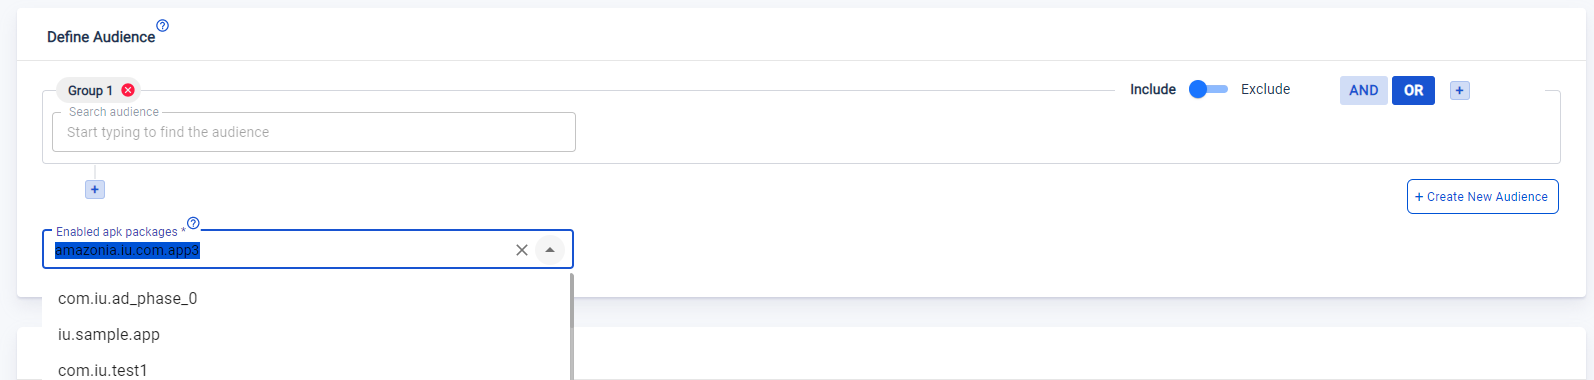
This is selected within the Audience component during the campaign creation process.
A source package is the "file name" of your app. Different apps have different source package names.
Let's say a company has 2 apps, one that allows users to read E-books and another that lets users listen to podcasts. Now let's say some users have both apps installed. When you create a campaign to which app should this campaign be sent through?
If it is a Monetization campaign, it doesn't really matter because all campaign will start with a Push notification arriving on the user's home screen. Just ensure that you send it through an app that is active, not uninstalled, to increase your chances of reaching the user.
Also, Monetization campaigns usually have the goal to maximize clicks or impressions.
Hence, for Monetization campaigns, the platform will always send the campaign through the app that is active - last to communicated with our SDK - whichever that app may be.
For Engagement campaigns, you need to specify the app. This is because Engagement campaigns tend to be app specific. Eg: A campaign of free E-books for E-book readers.
And also, Engagement campaign have the option to shoot In-App messages that appear inside a specific app.
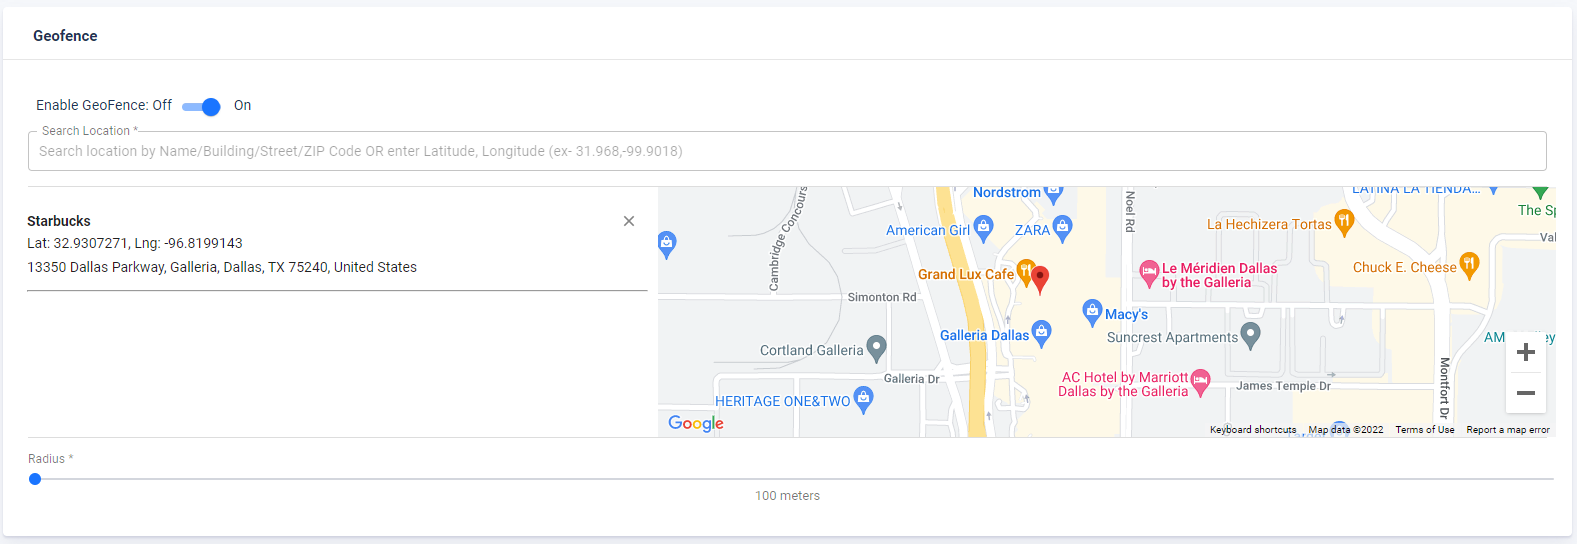
Geofence
Only for Monetization campaigns, we have the option to set a geofencing for our campaign.
A Geofence is a geographic area defined by a radius around a location selected on the map.
We can use it so that the campaign will only trigger if a user crosses the area marked by this radius.
Let's say you have a restaurant and you want your push campaign to reach users with a coffee discount only when they are 100 meters from the store. All you need to do is to type in the address of your restaurant and define the radius distance on the scroll bar:
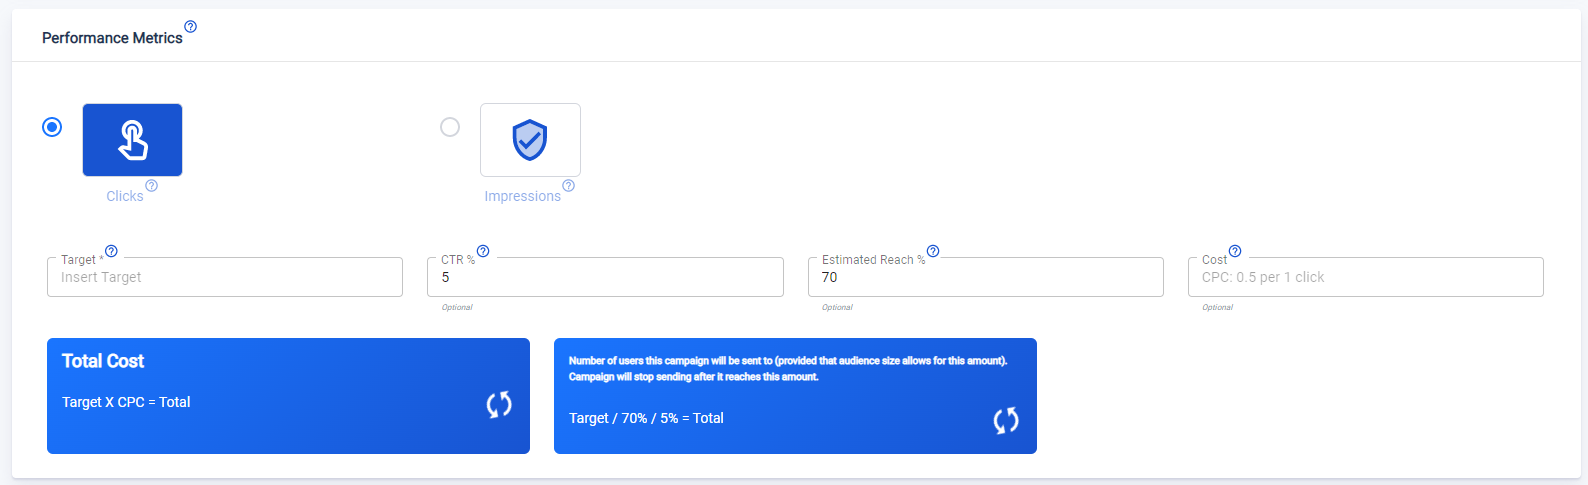
Performance Metrics
Specifically for Monetization campaigns, you can select how you want to measure success.
It can be by the number of clicks, impressions, video views or installs.
Insert your target for the selected metric in the target field.
You also have the option to include an estimated CTR (click through rate) and reach for this campaign.
Finally, you can fill in the cost per click, cost per thousand impressions or cost per views.
To know more go to Performance Metrics: know more.
[Video] - Settings: Audience / Performance Metrics
Schedule
Select when you wish to send your campaign.
To know more go to Scheduling Options: know more.

[Video] - Settings: Scheduling
Custom Tracker Links
You have the option to track specific events in your notification and send back information when these events occur by using tracker links URLs.
The available actions for tracker links include “Notification Shown”, “Notification Clicked”, “Banner Shown”, “Banner Clicked”, “Action Complete” (a specific action inside the app, to be defined by the user).
You can either assign one URL link to each of the events or use the same for all the events by clicking on “Common Tracking URL” and checking the boxes corresponding to the events you which to track. To know more go to Custom Tracker Links: know more.

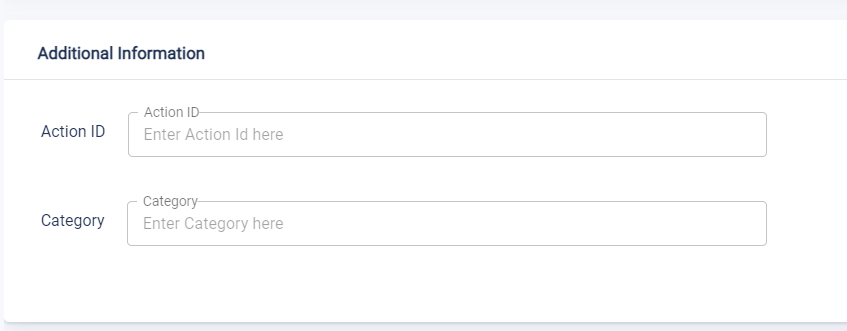
Additional Information
It is possible that your organization has information that is relevant to be linked to your campaign and that has no impact on the user. This is the case of the additional information field, available to all customers, which can be customized according to different needs and demands.
Updated 5 months ago